
When importing certificates, the Certificate Import Wizard manages this process. This wizard can be used to import Certificate Authority or Personal certificates.
The initial wizard screen is shown in Figure 1 below.
Figure 1
Click the Next button to continue. If you are importing a CA certificate (i.e., a certificate being downloaded from Vertifi's web server), skip to Select Certificate Store below.
For certificates being imported from a file, the next screen will display similar to Figure 2 below.
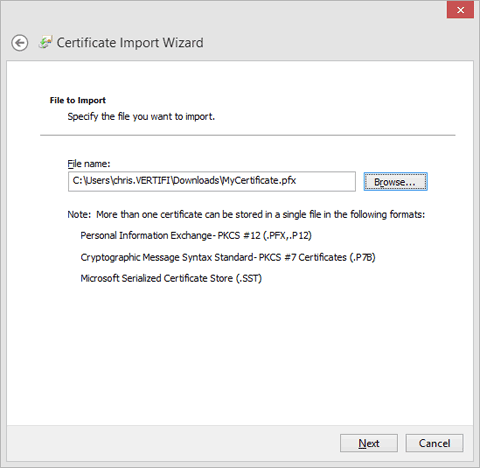
Figure 2
Enter the file location and name of the exported certificate. Click the Next button to proceed to the next step.
Note: If you don't know the exact file location/file name, you can use the Browse button to locate it. Be sure that the File Types setting of the Browse window is set to Personal Information Exchange (.pfx) when searching for this file.
The next step will prompt you for the password used to protect the exported certificate as shown in Figure 3 below.
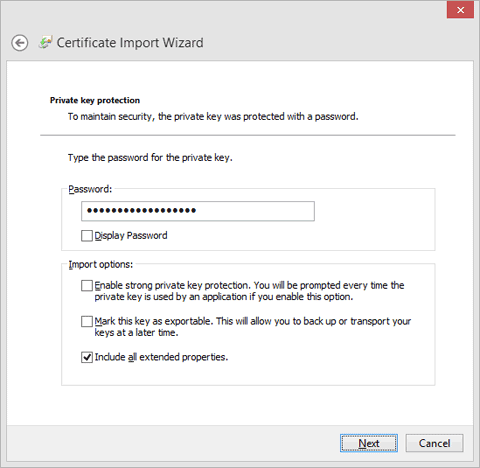
Figure 3
Enter the password that was used to encrypt (export) the file. If you want the certificate to be exportable from this system, select the "Mark this key as exportable" option. Click the Next button to proceed to the next step.
The next wizard screen will appear as in Figure 4 below. This screen prompts the representative to identify the certificate store for this certificate.

Figure 4
Accept the default, Automatically select the certificate store based on the type of certificate. With this option, the certificate import wizard will be able to identify from the certificate whether it is a CA certificate or a personal certificate, and install it into the appropriate certificate store. Click the Next button to continue.
A screen similar to Figure 5 below will be displayed.

Figure 5
This final dialog will show the certificate store selected (Figure 5 shows a CA certificate installed, since Certificate Authorities are also called Trusted Roots). Click the Finish button to complete the import. A pop-up message similar to Figure 6 below will appear. Click the OK button to complete the import.
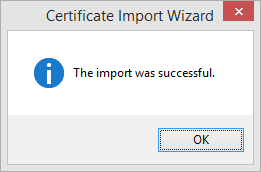
Figure 6