When exporting certificates, the Certificate Export Wizard manages this process. This wizard can be used to export Certificate Authority or Personal certificates.
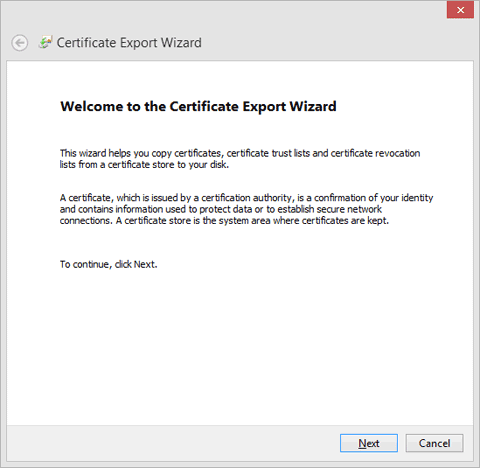
The Certificate Manager Export Wizard will run and display a screen similar to Figure 1 below.
Figure 1
Click the Next button to proceed to the next step. The next step asks if you want to export the private key.
You must choose if you want to export the private key. A screen similar to Figure 2 below will be displayed.
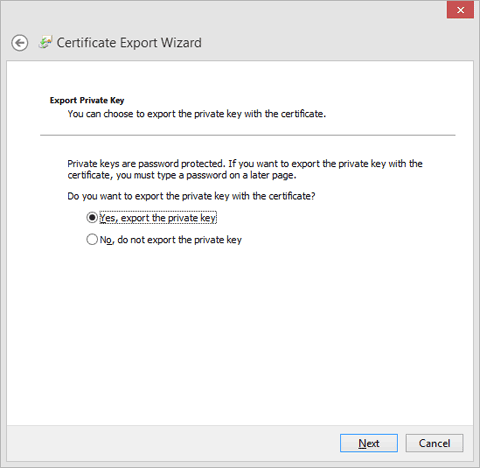
Figure 2
Select Yes, export the private key.
Note: In order to import this certificate to another machine, you must export the private key.
Certain versions of Internet Explorer will disable this option. This means that the certificate was not created as an exportable certificate. Other browser versions will leave this option enabled even if the certificate is not exportable. In this case, an error message is displayed at the very end of this process.
If your certificate is non-exportable, and you must have an exportable certificate, contact your Local Security Administrator (LSA) or Vertifi for assistance, and a new certificate can be issued. Exported certificates should be treated with care, as they can be imported anywhere if someone gets a copy of the file and knows (or can guess) the password.
Click the Next button to continue.
You must select the export file format. A screen will be displayed similar to Figure 3 below.
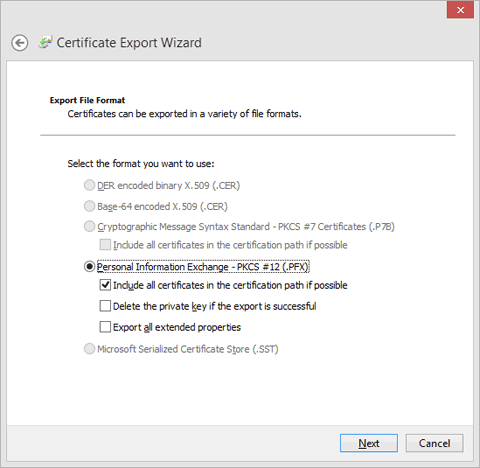
Figure 3
PKCS #12 is the default format. Accept the defaults on this screen and click the Next button to continue.
You must select a password that will be used to encrypt and protect the exported certificate. A screen will be displayed similar to Figure 4 below.

Figure 4
This password will be required in order to import this certificate in the future. Any person who can obtain a copy of the exported certificate file, along with this password, can import the certificate. You may also choose to associate the exported certificate with a Active Directory group or user.
Click the Next button to continue.
You must select the location and enter the name for saving the exported certificate file. A screen will be displayed similar to Figure 5 below.
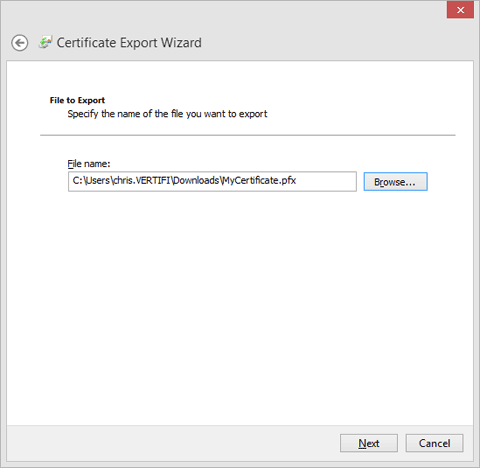
Figure 5
Enter the desired location and name of the file; this location must be accessible by the representative with this PC or placed on a flash drive for easy access. Click the Next button to continue.
The final step in the wizard is just a confirmation to finish the process. A screen similar to Figure 6 below will be displayed.
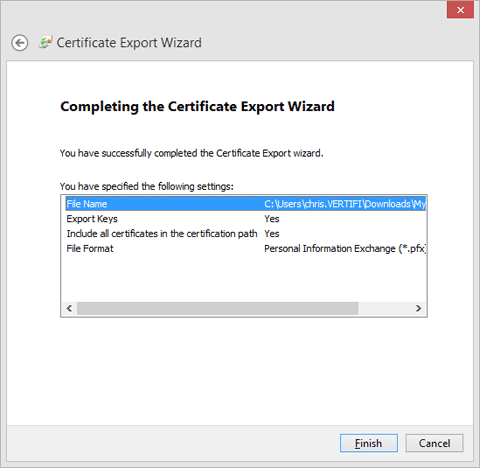
Figure 6
The parameters selected in the earlier steps are displayed to the representative. Click the Finish button to complete the certificate export. You will get the message "The export was successful", as displayed below in Figure 7. Click OK.
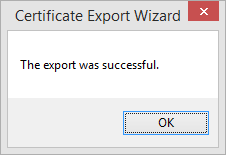
Figure 7